Crawl Space Framing Sealer & Waterproofing
Challenge
When Sam noticed some water pooling in the corner of his crawl space, he decided to give TFS a call for a complimentary inspection.
Our specialist arrived and performed a full inspection on Sam’s home. He noticed some water pooling in the crawl space, as well as some mold starting to grow on the floor joists and subfloor of the home.
Sam’s primary concern was finding a solution to the water in his crawl space as well as stopping the spread of mold and giving the wood under his home a longer lifespan. He decided to call us because he didn’t want his home to lose value from the mold and water.


Solution
Our specialist, Matthew Stone, recommended a full crawl space encapsulation along with a coat of our Watson Seal LumberKote wood sealant, and a sump pump. Sam opted for just the LumberKote wood sealant and the sump pump with Hydraway on each side.
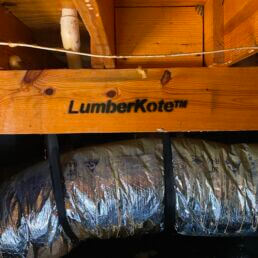
The plan called for the crew to coat all exposed wood with Watson Seal LumberKote, sealing the wood from oxygen and moisture, preventing the growth and spread of mold and wood rot.
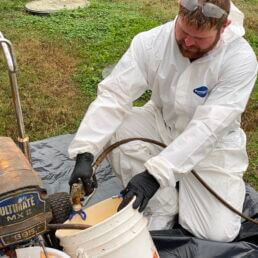
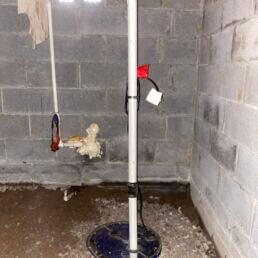
Our specialist predicted that around 5 buckets of LumberKote would be needed to complete the project. The plans included a sump pump installation in the lowest point of the crawl space. For Sam’s crawl space, this was the North-East corner. Sump pumps are always placed in the lowest point in a crawl space so that the water naturally flows into the pump, removing it from the crawl space.
The pump was installed with 15 feet of Hydraway on each side to further help the flow of water into the pump. The pump was then hooked up to a drainage pipe outside of the home which drained into a discharge trench with a bubbler pot at the end.
The first step was to remove all insulation from the crawl space. This was done for two reasons. The first reason is because insulation can soak up and trap moisture. The second reason is to provide as much wood as possible for the LumberKote Sealant to coat.
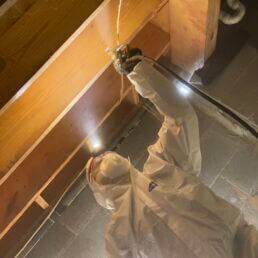
Once all insulation was removed, the crew applied the Watson Seal LumberKote to all wood underneath the crawl space via spray guns.
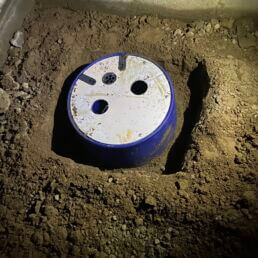
After the entire crawl space was coated, it was time to dig a hole for the sump pump. The basin and pump were then placed in the hole, which was back filled halfway with tightly compacted dirt, and with approximately 4 buckets of gravel filling in the rest. The gravel helps the flow of water into the basin of the pump.
Next, trenches were dug for the Hydraway on each side of the pump, which was then placed and backfilled with dirt. A discharge hole was drilled through the outside wall into the crawl space, and a drainage pipe was fed through the hole and connected to the sump pump.
An ice guard was applied to the end of the pipe to prevent water from backing up into the pump in the event of freezing temperatures. Finally, a discharge trench was dug outside of the home underneath the drainage pipe and fitted with a piece of pipe with a bubbler pot at the end.
All said and done, Sam was very satisfied with our service and for the peace of mind that his home’s value was protected from mold growing in his crawl space. Based on the size of the home, this looked to be a two day project, but the dedicated members of our production team were determined to knock it out in just one day, and they did. This project is just another example of how the TFS team redefines the customer experience every chance we get!
Project Summary
Specialist
Matthew Stone
Team Leader
Austin Pollock
Materials Used
Sump Pump (1), Hydraway (30 ft), Watson Seal LumberKote (7 buckets)